

Farmer’s Guide to Growing Kale unlock the power of this hardy, nutrient packed superfood. Dear farmer, imagine stepping into your field on a crisp morning and harvesting armfuls of vibrant, deep-green kale leaves that are sweeter and more flavorful because of the light frost they endured overnight.
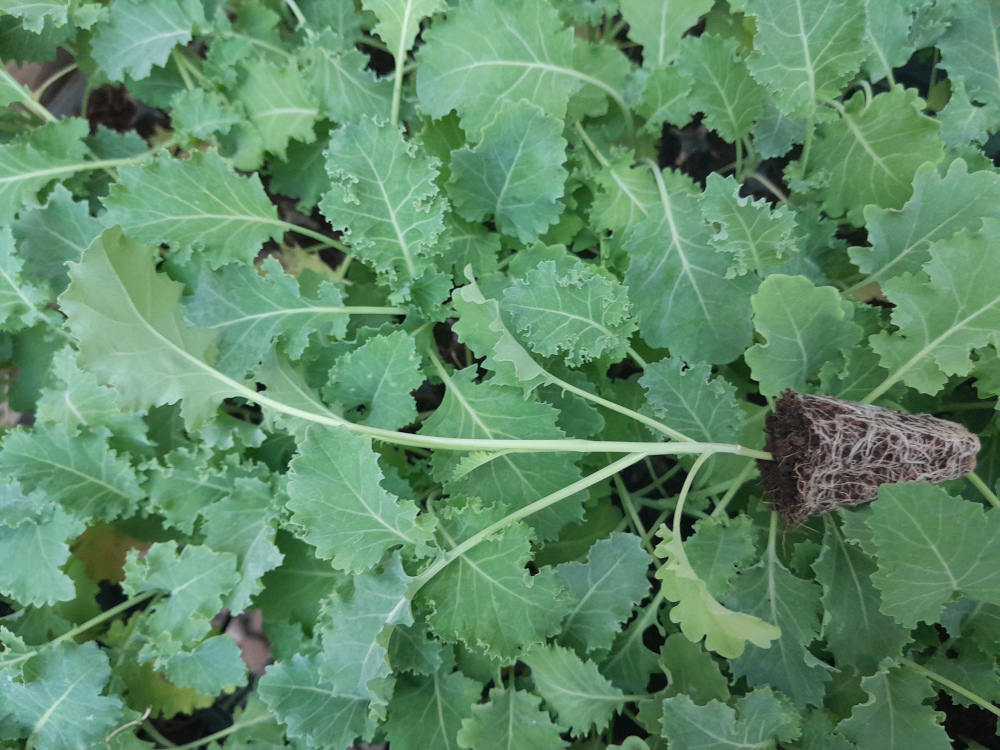
Kale, also called leaf cabbage, belongs to a group of cabbage cultivars primarily grown for their edible leaves, but it is also used as an ornamental plant. Its multiple different cultivars vary quite a bit in appearance; the leaves can be bumpy, curly, or flat, and the color ranges from purple to green.
This resilient leafy green not only thrives when many other crops struggle, but it also delivers exceptional nutrition and steady income potential throughout the cooler months. Whether you are a small-scale grower feeding your family or a commercial farmer supplying local markets, mastering kale cultivation can transform your season with reliable yields and high-quality produce.
Kale (Brassica oleracea var. sabellica) is a nutrient-rich leafy green that thrives in cooler climates and can be grown year-round in many regions when managed correctly. By understanding its needs and following proven practices, you can produce tender, delicious kale with minimal setbacks.
Ecological Requirements for successful kale growth
Kale performs best in well-draining loamy soil that is rich in organic matter, with an ideal soil pH between 6.0 and 7.5. Before planting, test your soil and amend it as needed with lime to raise pH or sulfur to lower it, while incorporating generous amounts of compost to improve fertility and structure.
Kale prefers cool weather and grows optimally at temperatures between 60°F and 70°F (15°C to 21°C).
It is quite frost-tolerant, and exposure to light frost often enhances the sweetness of the leaves, making it suitable for extended seasons in many areas. For sunlight, kale thrives with 6 to 8 hours of full sun daily, although it can tolerate partial shade without major loss in quality.
Consistent moisture is essential for steady growth, so aim to supply about 1 to 1.5 inches of water per week, especially during warmer periods, while avoiding waterlogging that can damage roots.
Proper spacing is also important for optimal growth and airflow. Space individual plants 12 to 18 inches apart within rows that are 18 to 30 inches apart. This arrangement reduces disease risk and allows each plant enough room to develop large, healthy leaves.
Step by step planting guide for kale
To establish a strong kale crop, begin by deciding whether to start from seeds or transplants. Many farmers prefer starting seeds indoors 4 to 6 weeks before the last spring frost or 6 to 8 weeks before the first fall frost for earlier harvests and better control. You can also direct-sow seeds outdoors 2 to 4 weeks before the last expected frost.
Prepare your planting beds by loosening the soil to a depth of 6 to 8 inches and mixing in compost or a balanced fertilizer to provide an early nutrient boost.
When sowing seeds, plant them ¼ to ½ inch deep. If direct-sowing, space seeds about 1 inch apart and thin seedlings to the final spacing once they develop 3 to 4 true leaves. For transplants, set them in the ground at the same depth they were growing in their containers and water gently to settle the soil.
Keep the soil consistently moist until germination, which typically occurs within 5 to 17 days. Using floating row covers in the early stages can protect young plants from pests and unexpected cold snaps. For a continuous supply of fresh kale throughout the season, practice succession planting by sowing new seeds or setting out transplants every 2 to 3 weeks during your suitable growing period.
Essential nutrients and fertilizer recommendations for kale
Kale is a leafy green that demands steady nutrition, particularly nitrogen for vigorous leaf development. Nitrogen promotes strong foliage and overall plant growth, while its deficiency causes yellowing leaves and stunted plants. Potassium improves leaf quality, enhances disease resistance, and helps regulate water uptake, with shortages showing as yellowing along leaf margins or tips. Phosphorus supports healthy root systems and energy transfer, and low levels may turn leaves dark green or purplish.
Calcium strengthens cell walls and prevents tip burn in young leaves, magnesium is critical for chlorophyll production and photosynthesis, and sulphur aids protein synthesis, with its lack often mimicking nitrogen deficiency through yellowing of younger leaves. Micronutrients such as iron, manganese, zinc, copper, boron, and molybdenum, though needed in smaller amounts, play vital roles in various plant processes.
Always begin with a soil test before planting to determine exact nutrient needs and pH levels. For organic options, incorporate compost to improve soil structure and supply a broad range of nutrients, use well-rotted manure for slow-release nitrogen, phosphorus, and potassium, apply bone meal for phosphorus to encourage root growth, and add kelp meal for trace minerals and natural growth hormones.
If using synthetic fertilizers, a balanced product such as 10-10-10 can be worked into the soil at planting time. Once plants reach 6 to 8 inches tall, side-dress with a nitrogen-rich fertilizer like urea or ammonium nitrate to sustain leafy growth, repeating every few weeks as needed.
Foliar feeding with liquid fertilizers can quickly correct visible deficiencies. Mulching with organic materials such as straw or compost helps retain moisture, suppress weeds, and gradually release nutrients back into the soil as the mulch decomposes.
Regular monitoring and adjustments based on plant appearance and soil conditions will help you achieve both high yields and superior nutritional quality in your kale.
Common problems affecting kale and practical solutions
Even with good planning, kale can face several challenges, but most can be managed effectively with timely action. Pest infestations from aphids, cabbage worms, and flea beetles can quickly damage foliage and reduce both quality and yield. To control these, introduce beneficial insects such as ladybugs and parasitic wasps, apply organic insecticidal soap or neem oil sprays, and protect young plants with floating row covers that allow light and air while blocking pests.
Diseases like downy mildew, black spot, and clubroot can weaken plants and spread rapidly. Combat them through crop rotation to avoid planting brassicas in the same location for at least three years, by selecting disease-resistant kale varieties, and by promptly removing and destroying any infected plant debris while maintaining overall garden cleanliness.
Nutrient deficiencies, often showing as yellowing leaves or poor growth due to shortages of nitrogen, magnesium, or iron, are best addressed by conducting soil tests and amending with appropriate fertilizers or compost, while ensuring balanced feeding and applying mulch to support long-term soil health.
Environmental stress from extreme heat, drought, or temperature fluctuations can cause wilting or tough, bitter leaves. Maintain a consistent watering schedule, use mulch to stabilize soil temperature and moisture, and provide temporary shade cloth during periods of intense heat. Improper harvesting techniques, such as cutting too aggressively or damaging the growing point, can stop further leaf production.
Always use clean, sharp scissors to remove outer leaves first while leaving the central crown and inner leaves intact so the plant can continue growing.
Finally, poor soil quality from compaction or incorrect pH can lead to stunted plants. Improve this by regularly adding organic matter such as compost or well-rotted manure and by testing and adjusting soil pH to stay within the optimal 6.0 to 7.5 range.
Proper harvesting methods for continuous production
Kale is an excellent cut-and-come-again crop that can provide repeated harvests over many weeks or months when handled correctly. Begin harvesting once the outer leaves reach a usable size, typically 8 to 10 inches long, which usually occurs about 50 to 65 days after seeding depending on variety and conditions.
Use clean, sharp scissors or shears to cut individual outer leaves at the base, taking no more than one-third of the plant at any single harvest. This selective approach leaves the inner leaves and growing tip undisturbed so the plant keeps producing new foliage. For baby kale, you can harvest younger, tender leaves earlier when they are 3 to 4 inches long. Harvesting in the cool morning hours often yields the best flavor and crispness.
Leaves that have experienced light frost tend to be sweeter and more tender, so continue picking into the cooler months where your climate allows.
After harvest, cool the leaves quickly and store them at around 32°F with high humidity to maintain freshness for market or home use. By never stripping the plant completely and maintaining good overall care, you can enjoy a steady supply of high-quality kale from the same plants for an extended period.
Conclusion
Growing kale successfully comes down to giving the plants what they need at every stage: healthy soil, consistent care, smart spacing, and thoughtful harvesting. When you invest time in proper soil preparation, balanced nutrition, and proactive problem-solving, you will be rewarded with vigorous plants that produce tender, nutrient-dense leaves for weeks on end.
Kale’s ability to tolerate frost, its high market value, and its impressive nutritional profile make it one of the smartest crops any farmer can include in their rotation.
Start small if you are new to it, observe what works on your land, and scale up with confidence. With these practices in place, you can look forward to abundant harvests, healthier soil, and the satisfaction of supplying fresh, flavorful kale to your family or customers season after season. Here’s to strong plants and bountiful yields—get your kale in the ground and watch it thrive!